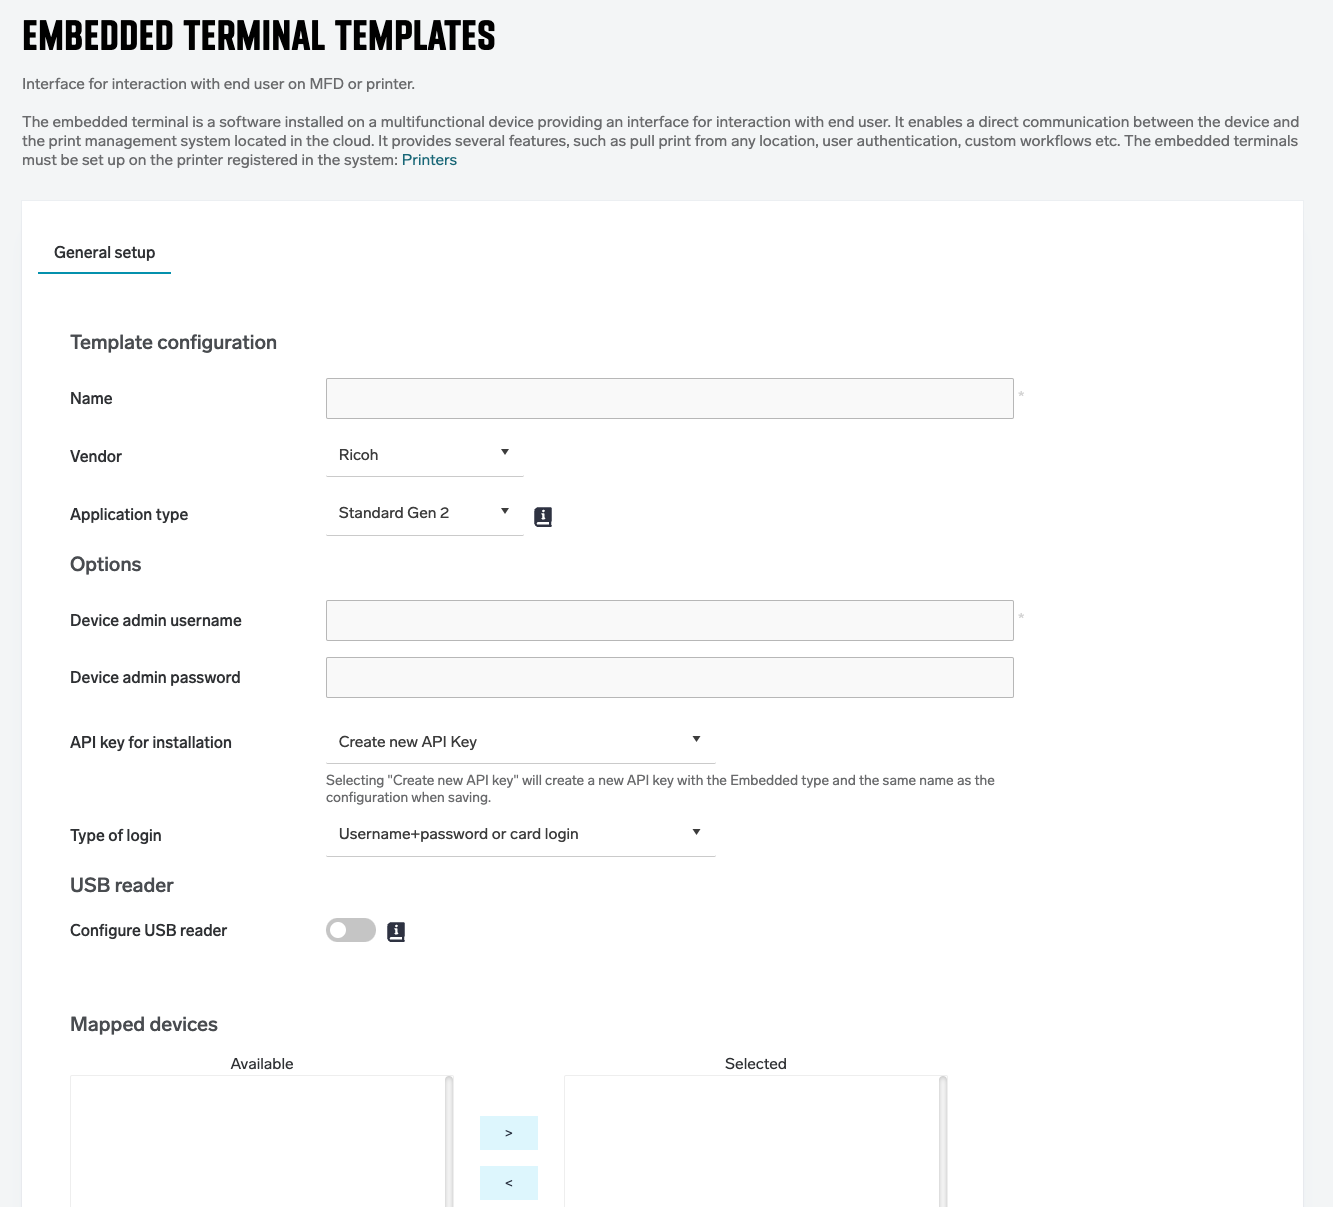
Before you can install a terminal on an MFD, you must create a configuration for it. This is done in the Printers > Embedded terminal templates section of PMC Web UI. You can have any number of configurations, for example, one configuration for MFDs at one site, and another configuration for MFDs of the same brand at another site.
You can use the Filter field to search for the already created terminals.

Creating a new embedded configuration
-
Log in to the PMC Web UI and click Printers > Embedded terminal templates tab.
-
Click Add.
-
A new dialog window will be displayed.

-
The available options depend on the MFD vendor selected. The general options are:
-
Device admin username – user name of the device administrator account
-
Device admin password – password of the device administrator account
-
Automatic logout timeout – timeout for automatic user logout due to inactivity, in seconds
-
Print all jobs on card login – release all jobs from the Pull print queue upon user authentication
-
Trim zeroes from card ID – remove leading zeroes from cards upon authentication or card self-enrollment
-
-
In Mapped devices, select the MFD where you want to use the configuration. Alternatively, you can add devices later on if you haven't added them to PMC yet. For adding printers, see Printers.
If you don’t see a particular MFD in the list of available devices, make sure you have configured the Terminal Client Service and that you have enabled the At printer (Embedded terminal) release option in the settings of the respective MFD in the Printers section of PMC Web UI.
-
Click Save.
Card conversions
Card number conversion can be used for the translation of card reader output (the data the reader gets after a user swipes a card) to a card number stored in the user database (LDAP, AD, PMC, etc.) if these two numbers are different.
Card conversions can be defined in Printers > Embedded terminal templates > Card conversions tab.
For more details, see (2025.12.11) Using Card Number Conversion.

Unknown logins
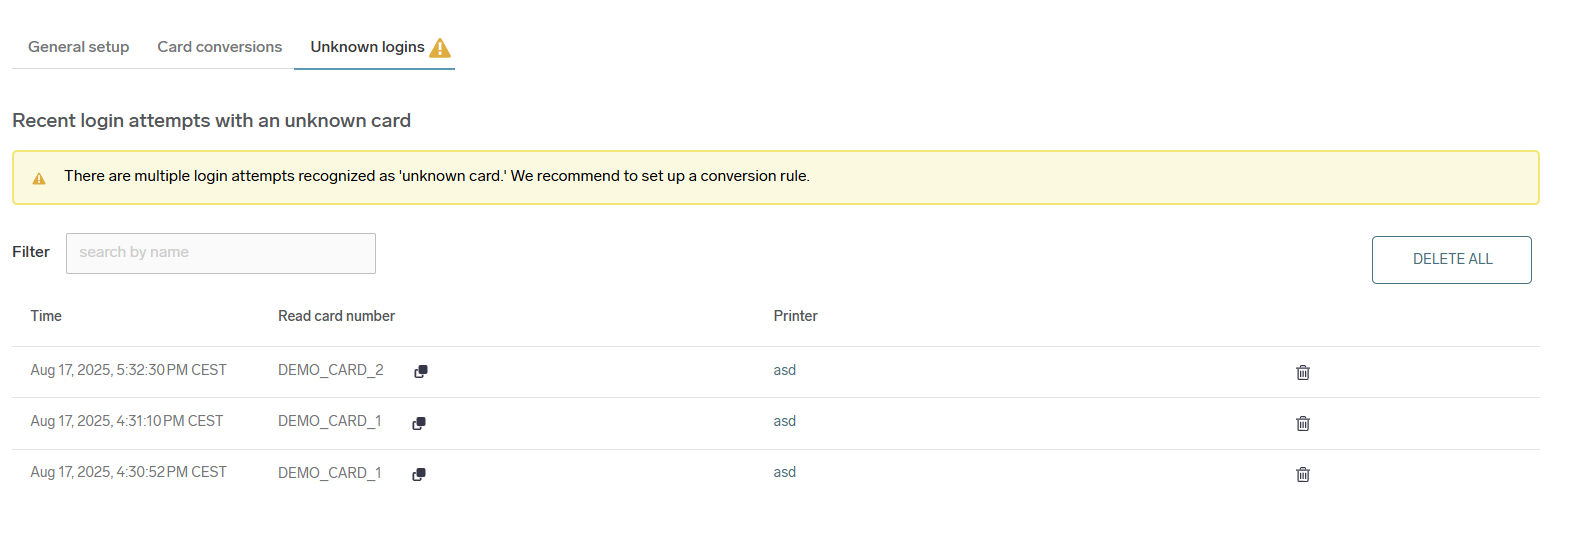
In the tab Printers > Embedded terminal templates > Unknown logins, you can see all failed card login attempts. The tab is visible to users with permission ViewTerminalConfig.
When a user uses an unknown card on the terminal and the system does not recognize the card, the user is prompted to register the card - a new row in the table Unknown logins appears with the read card data, the terminal from which the request came and the timestamp. A user with permission DeleteTerminalConfig can additionally delete the row from the table.

Deploying the configuration
-
After you have created the configuration, click the deploy icon

.
-
The following options will appear:

-
Install and Configure – Deploys (or re-deploys) the embedded application and sets configuration.
-
Configure – Sets configuration on previously deployed embedded application.
-
Uninstall – Uninstalls the embedded application from the device.
-
Manual operations – Describes manual installation steps and links to the documentation.
-
If the embedded terminal still appears on the MFD after uninstalling it, you may need to remove it directly through the MFD manufacturer’s application store or device management interface. Some devices manage embedded applications locally, requiring a manual uninstall.
