Overview
RICOH PMC Advanced Embedded Client is a Ricoh embedded product that manages the access to the device services (Copy, Scan, Fax) and offers additional scanning services:
-
Scan To Me with device Document storage for large documents,
-
Scan To Microsoft 365 with the support of OneDrive and SharePoint,
and an embedded web service for securely:
-
uploading the configuration files of the application: settings and certificates,
-
activating the debug logs,
-
getting application information.
Installation of Ricoh PMC Embedded is disabled for all accounts by default. If you wish to use this, please contact PMC Support to get this embedded application enabled for your account.
You will need to request new Ricoh PMC Advanced Licenses to replace any existing Ricoh SOP licenses.
Pre-installation setup
In order to use Ricoh PMC securely, you must set up certificates for the account:
Terminal Integrations Settings
Under “Service Information”, both “PMC Embedded Terminal” & “Ricoh PMC Advanced Integration” must be selected from “Terminal Integrations”:
Server-Domain mapping
For Ricoh PMC, we required that the “Server Domains” set under the “Server” is a DNS name. An IP address mapping will not work for this application:
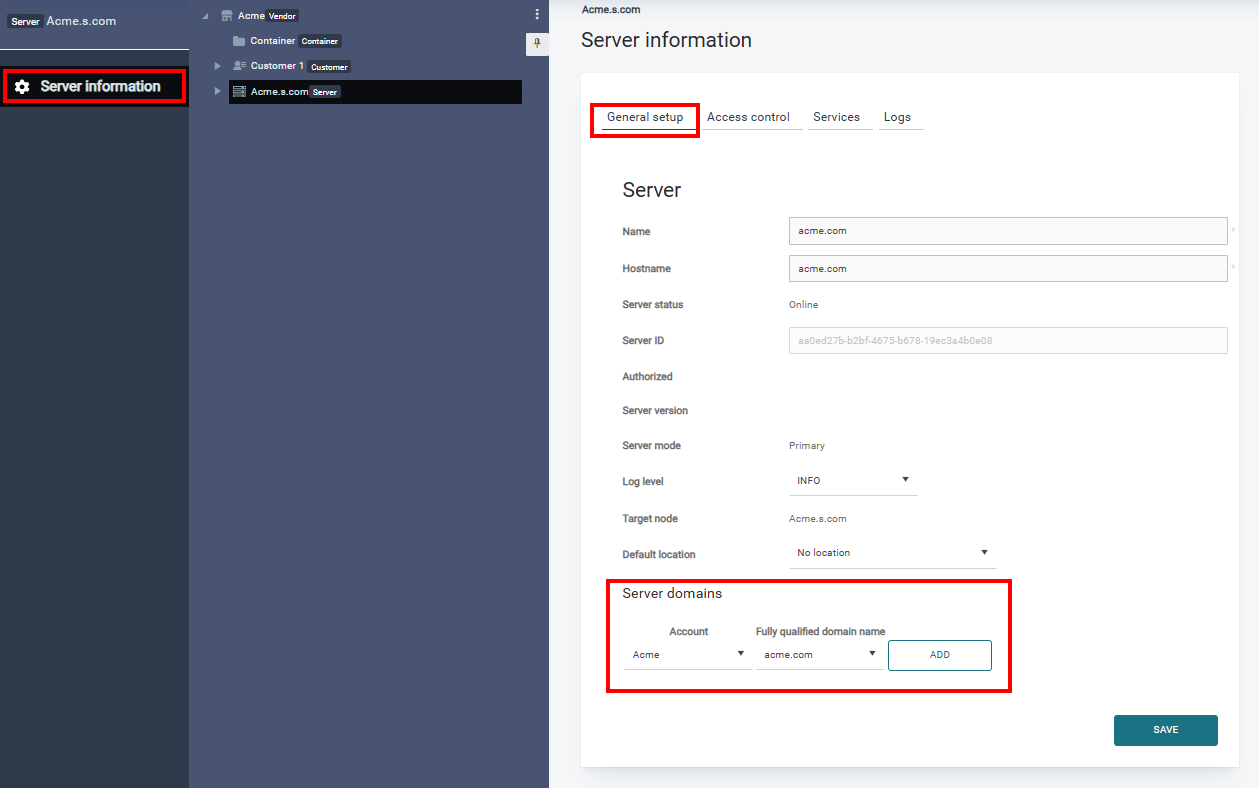
For more details, see Secondary Gateway mapping.
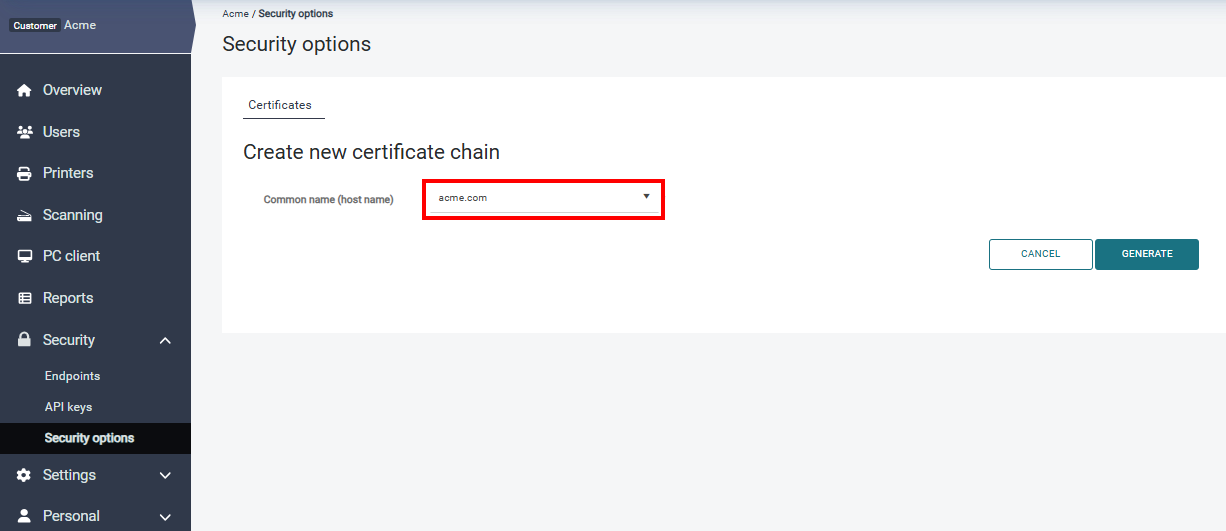
Create New Certificate
You can either import a trusted certificate or generate a new certificate with the domain name of the server. As mentioned above, this must be the hostname of the server & not the IP address:
Changes to the Security > Security options > Certificates section will take approximately 1 minute to be synchronized to the gateways. Therefore, any attempts to upload configuration to the Embedded client should wait at least this amount of time.
Create New Certificate for email
To enable security communication for any email functionality, you must import a Trusted CA Certificate for your system’s default email provider.
From the “Certificates” section, select “Import for Trusted CA Certificates”:
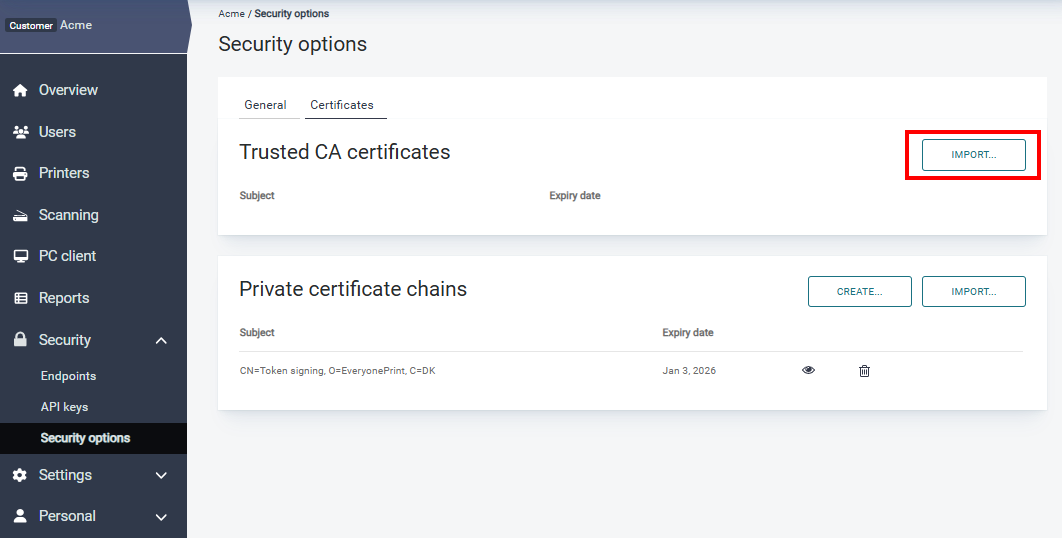
Upload the certificate via the file upload option.
Once uploaded, go to Settings > General settings > Messaging and either create a new messaging configuration or update an existing one to use the new certificate:
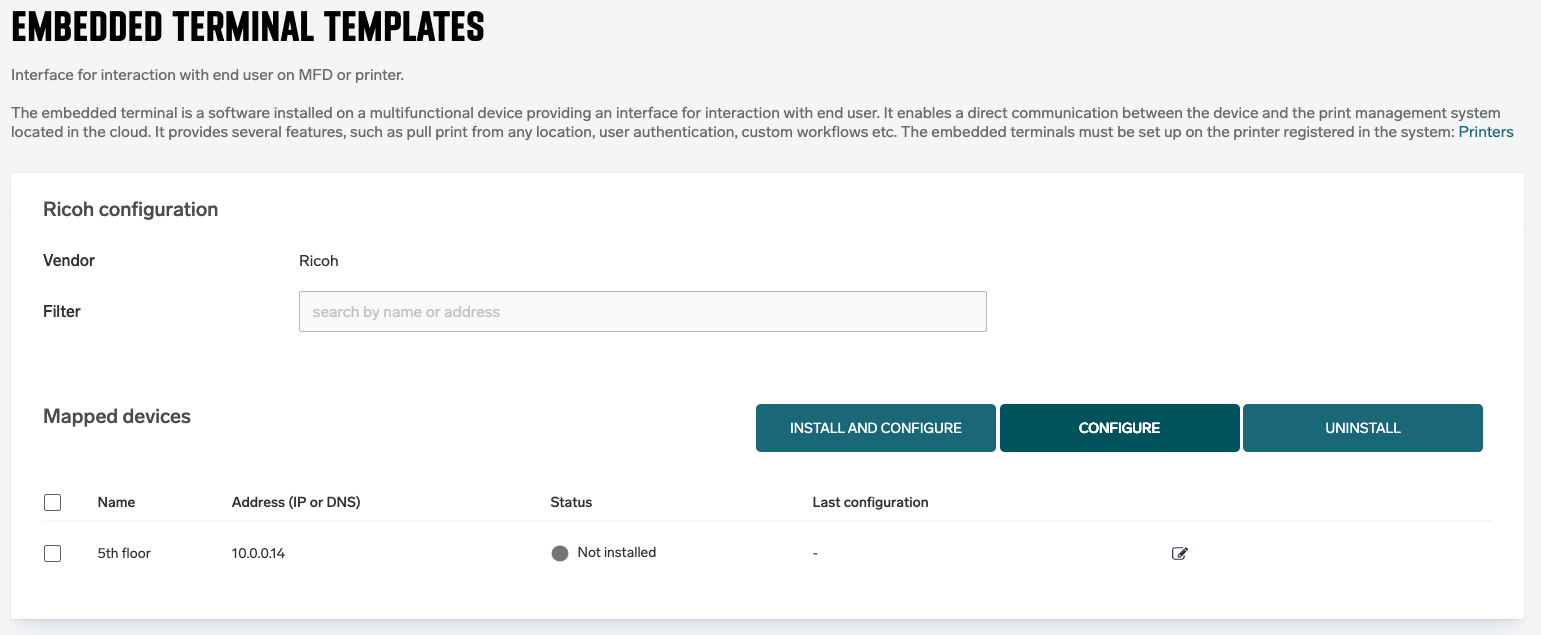
Installing the Embedded App on a Ricoh Machine (PMC Web UI)
Please be aware that all changes made during the application install, including the ones mentioned in the “Pre-Embedded Deployment setup” section, will not be reverted to their previous state / values after uninstallation. Following uninstall of the Ricoh PMC application, a factory reset must be done to revert to default settings.
Log in to your PMC Web UI and set up the Printer and Embedded settings. See Printers and Embedded Terminals' configuration.
To deploy the terminal successfully, the admin password for the printer must not be empty.
3.1 Setting the Embedded Configuration
From the options, select the following:
|
Field |
Value Required |
Mandatory |
|---|---|---|
|
Name |
Name of your embedded configuration |
Yes |
|
Vendor |
Select “Ricoh” |
Yes |
|
Application Type |
Select “Advanced” |
Yes |
|
Device admin username |
Enter your printer administrator username |
Yes |
|
Device admin password |
Enter your printer administrator password |
Yes |
|
Device Applications |
Select which applications you wish to install on the device |
Yes |
|
Authentication Options |
Choose one or more from “OTP Card enrollment,” “Card only authentication” & “Allow ShortId authentication” |
Yes |
|
Disable certificate check |
This must be unselected to use the secure certificate communication |
Yes |
|
Mapped devices |
Select the printer to be configured from the list of “Available” devices & use the right arrow to move it to “Selected” |
Yes |
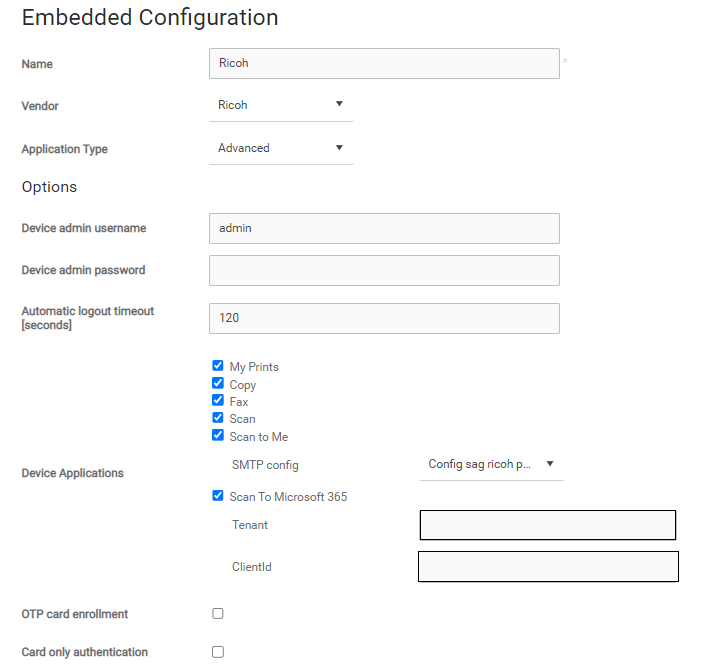
Note that for the Share to 365 option, you must provide the Tenant ID, Client ID & Redirect URI for the Microsoft Entra account/tenant this service is to be linked to.
Click Save.
Select the device in the Mapped devices section and click Install & Configure.